Using Toolbox as an ITIL Product
Toolbox shows an extensive list of device details harvested from the Discovery Engine using SNMP and from Windows products using WMI. The ITIL aspect of the product enables the user to add some extra details, such as detailed Location, Commercial details or modify the details from the Discovery Engine.
The Inventory system uses the Discovery Engine to populate the device database. Very many fields are setup automatically by the Discovery Engine, but fields such as detailed Location, Suppliers, Monetary Values, Warranties, and device state like Scrapped or In Storage cannot be set automatically. They need to be setup by the user, to do this see the guide below:
Updating Device Information
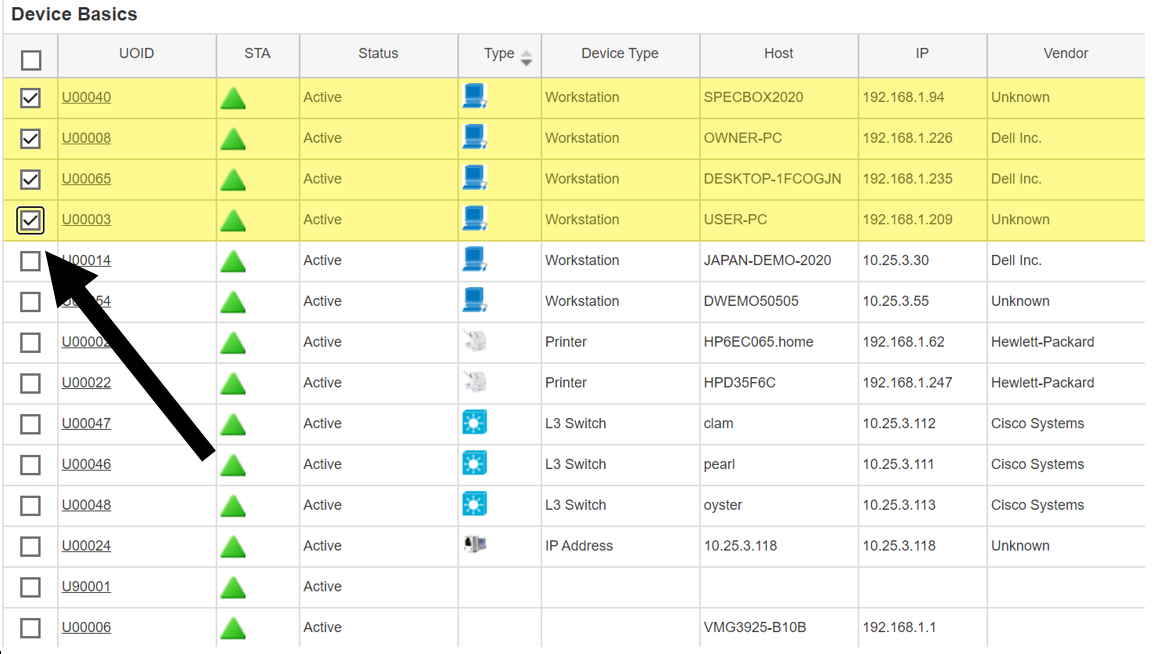
- Firstly, you must navigate to the inventory tab and load a Discovery to see a list of discovered devices. You may also choose to use the filter option to narrow down the list to specific devices.
- Next tick all the devices you wish to update. You may only want to update one device, but you have the option to update as many devices as you want all at once.
- Click on the Update Devices option to edit their information

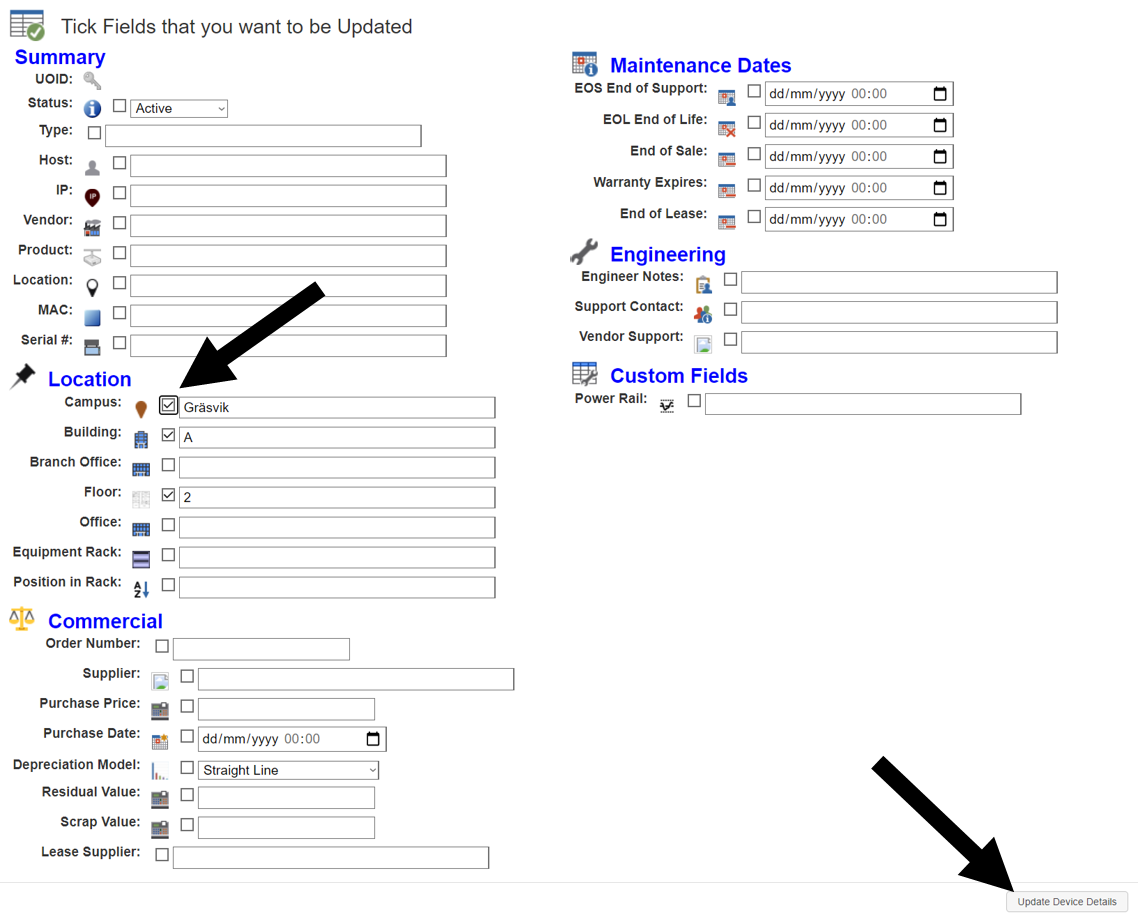
- A new window will appear, with fields that you can update manually. Remember that updates will only be registered if the Check box next to the field is ticked and Update Device Details button is clicked at the bottom of the window.
Adding New Devices
You may wish to add a new device to your Inventory since it was not discovered automatically, this could be because the device was in storage or offline during the discovery. To do this complete the following steps:
- Click on the Add Device option
- A new window will appear where you can input all the relevant information for the device in question.
- Once done adding the relevant information make sure to click the Add New Device button at the bottom of the window to save the device.


Tip: For multiple devices with most details the same for example Product Type, Supplier, Commercial Values, then its quicker to only add UNIQUE information during the Add Device stage. When all devices have been added, select them all in the Main Grid (or use a Filter to find them) then click Update Devices to set all the Common Details in one operation.
Adding Custom Fields (User Updateable Fields)
Toolbox supplies a large range of predefined fields such as Location, Commercial and Maintenance. In addition to these, there are up to 30 Custom Fields allowed. These Custom Fields can be updated by the user (User Updateable Fields). These extra fields behave in the same way as other built in standard fields with no restrictions meaning they are used in Filters, in Analytics, and Summary features. New fields are added in one click, then the attributes of the user field can be set up.
To access the setting for Custom Fields:
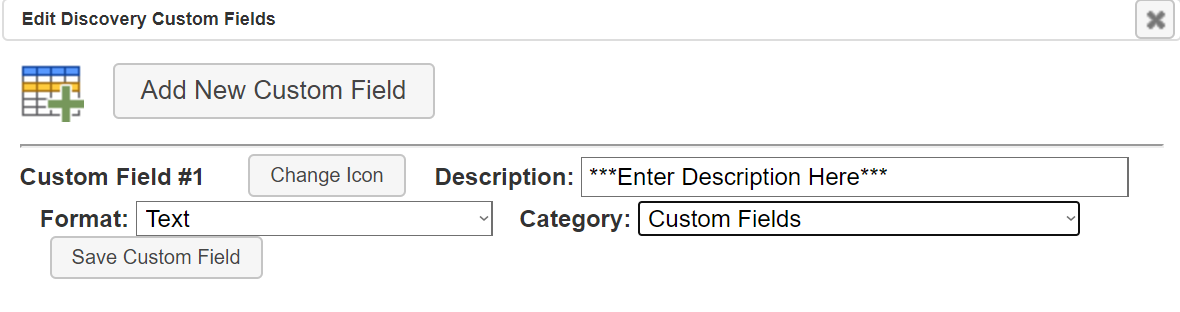
- Click the Settings option in the Inventory GUI
- Click Edit Fields
- Then click Add New Custom Field
- Now you may change the icon, description, format, and category of the Custom Field to suit your needs.
Note: As with other products, changing the details for a slot, need to be done with care, so as not invalidate existing usage of that slot. Minor changes are not typically a problem, such as changing the spelling or the Icon.
Using Inventory Groups
The system supports an unlimited number of Groups, and a device can be in multiple Groups (100s). Groups are created by the user. These groups are specific to Inventory and are separate from the product Groups used in Netflow etc.
The Groups feature is accessed by clicking on the icon below:

The main Groups Control dialog appears as below:
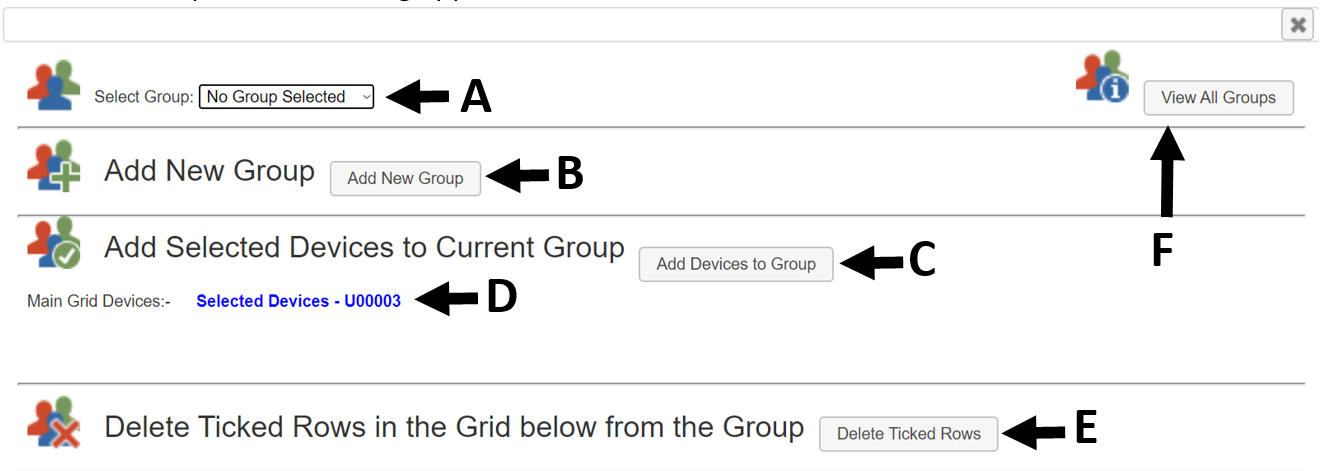
- Select a Group.
- Create a New Group
- Add devices to the selected group.
- Devices that have been ticked in the Main Grid.
- Open a Grid and select devices to remove from the selected Group.
- View all the Groups that have been setup.
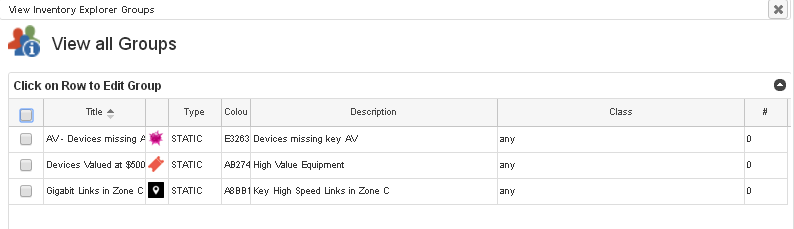
Viewing the Groups
Click on the View All Groups button to see the currently setup Groups as below:
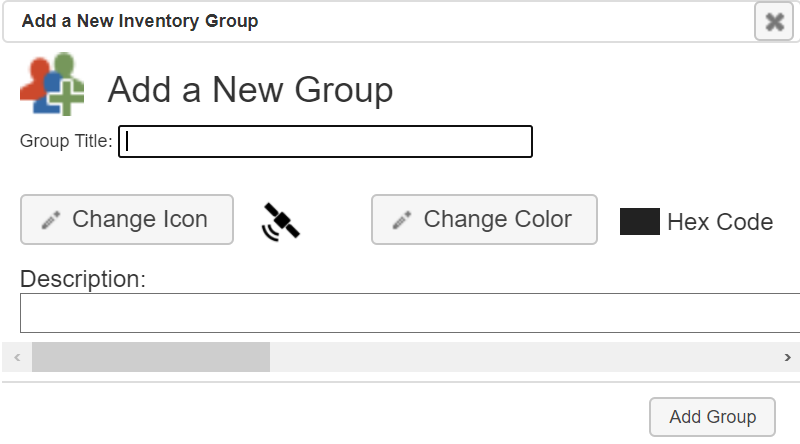
Adding a New Group
Click on the Add New Group button to add a new Group where you have to input a Group Title, optionally you may also change the Group Icon, change the Group’s colour, as well as adding a description.
Adding Devices to a Group
In the main report grid tick the devices that are to be added to the Group. Use Filters to automatically select devices to be added.
Now click on the Group Icon.
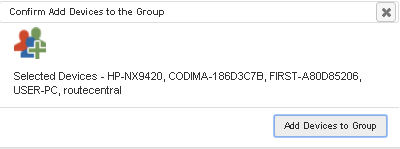
First select a Group in the main Group dialog. Next click on the Add Devices button.
The dialog lists the devices to be added. Click on the Add Devices to Group button to complete the operation.
Removing Devices from a Group
To remove devices from a Group first select a Group using the Select Group drop down menu at the top of the Groups dialog so that grid appears showing current Group members.

Tick Device rows that are to be removed from the Group. Click on the Delete Ticked Rows to confirm deletion of the devices from the Group.
Inventory Explorer Reports
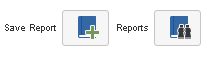
Inventory Explorer Reports are accessed by clicking on one of the icons below.
Reports to see the inventory explorer report list and Save Report to add a new inventory explorer report to the library.
Viewing Reports
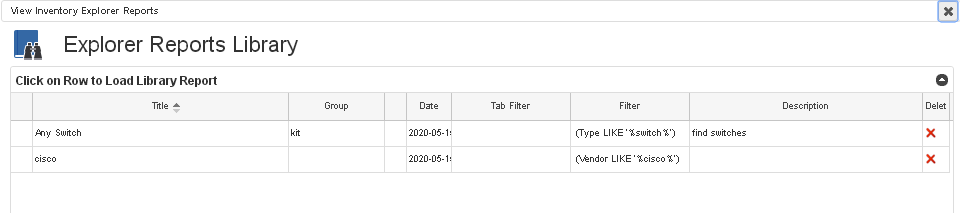
To view a Report simply click on a Report Row in the Grid.
Adding Reports

New Reports can be created by clicking on the Save Report icon. Details can be filled in as above. The Report Title is required; the other options to associate an Icon, a Classification and Description are optional but recommended.
A new Report would typically be created after Filtering an existing main grid report, for example to Filter on location, Asset Value etc.
Drill Down Inventory Explorer Reports
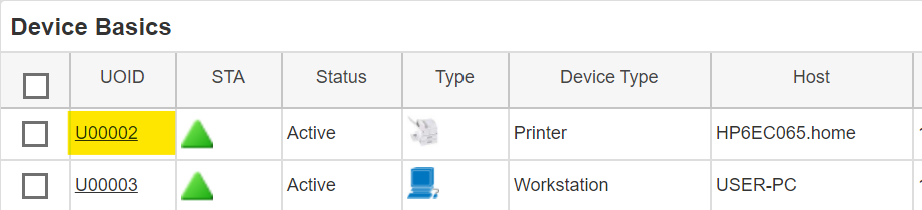
From the Main Grid the Device Identifier (U00099 format) can be seen underlined. Click on the link to see the Device Drill Down Inventory Explorer Report (Marked below in yellow):
The report is controlled by a set of Tabs: Per Device Discovery Overview, User Update, Interfaces, Hot Fixes, Drill Down Processes, Drill Down Services.
See details on each Tab below.
Per Device Discovery Overview Tab
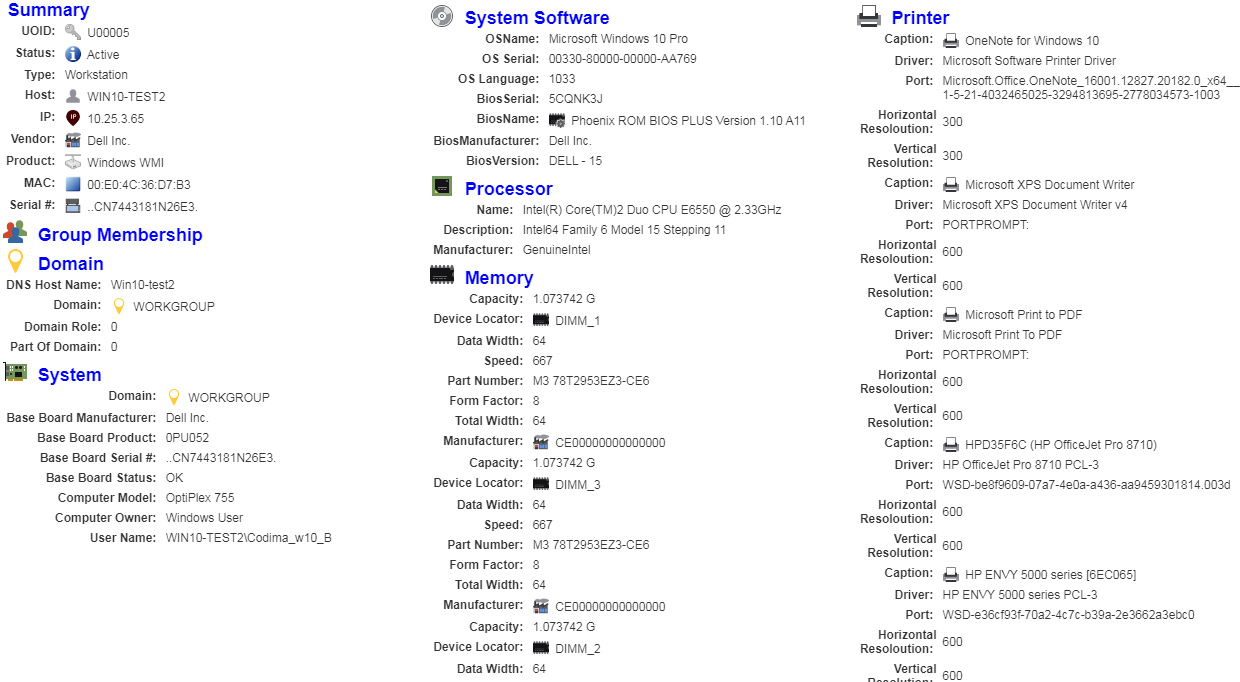
This report provides a detailed analysis of the selected device found during the Discovery process. A device that supports WMI provides a more extensive report.
User Updates Tab Analysis
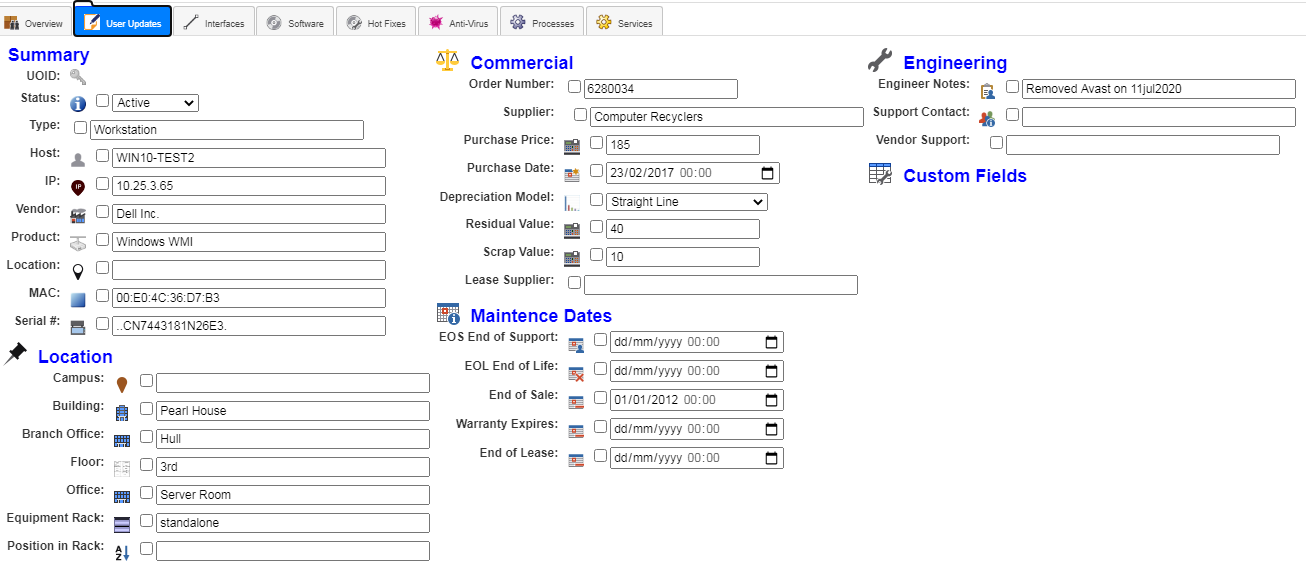
Details can also be amended from this screen by ticking the fields tick box(s), then clicking on the Save Ticked Details button for one or more updates to this device’s database record.
Interfaces Tab

This tab gives details of the Interfaces present on the drill down device. Both ends of the link are shown in the grid including, IP, MAC, speed, device details. The Grid can be Filtered and Sorted as with other Grids, the columns and the grid itself are fully dynamic, and can be dragged bigger or smaller.
There are a large number of possible fields available for this grid, these can be added or removed by clicking on the column picker icon as below.

Hot Fixes Tab
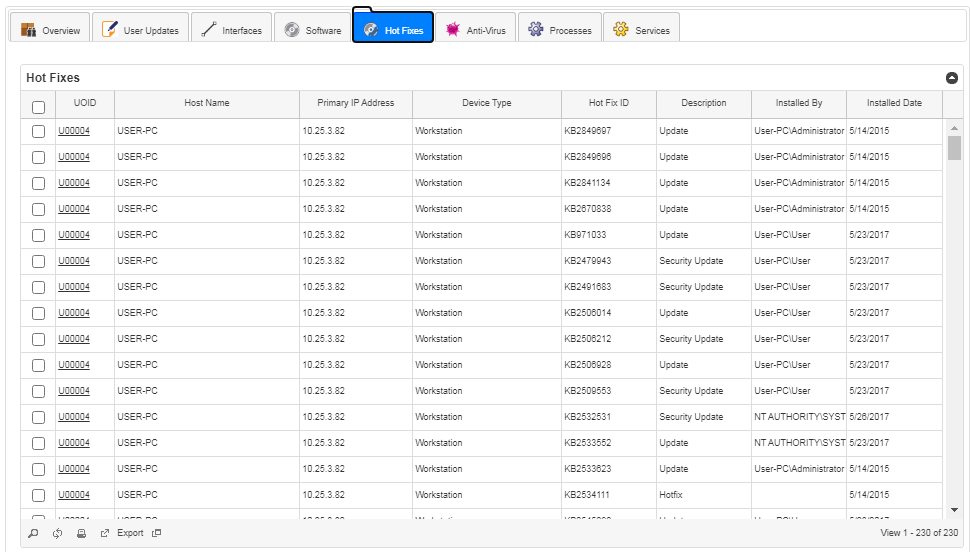
This provides an analysis of Hot Fix/ Security Patches installed on the selected device – at Discovery time.
Drill Down Processes Tab
This is a list of Processes that were running on the device at Discovery Time (note. Toolbox Monitoring does this in real time).
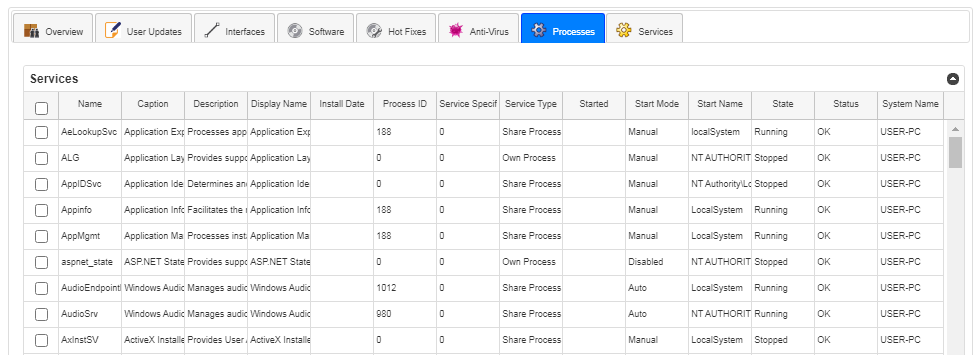
Drill Down Services Tab

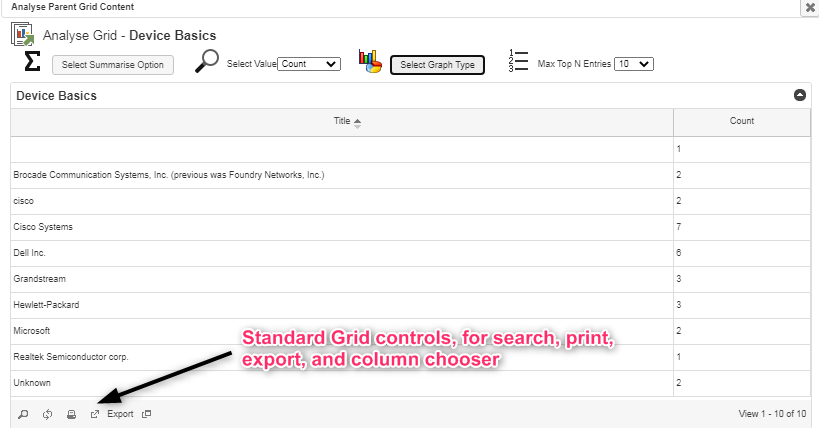
Tabular Analyses using Grids can also be created to show results in columns with multiple values for some Fields like Sales Values. Grids also allow numeric CSV (Excel) output plus all Grid Export formats. The Grids allow Sort, Search and Column Entries selection. The grids can also be resized per column and the whole grid in the dynamic Toolbox GUI. See below: